 Hey guys, Life: By J&L here. In this tutorial, we will teach you how to create your own DIY Geometric Canvas Painting.

Materials:
- 1-2 acrylic paints
- Canvas (any size works, We used a 12 by 12 inch canvas)
- Sizers
- Paint Brush
- Painters tape
- Small paint brush (opinional)
 First:
 - Use the painters tape, and tape 4 pieces in a diagonal form (shown above)
 Second:
 - Take one of your paint colors, and fill in the white space. Fell free to put two layers the paint, if the paint color is not thick enough.:
- Wait about 5-10 minutes for the paint to dry a little bit. Once dry, slowly peel the painters tape off the canvas.
 Step 3:
 - On the opposite side of the stripes you just painted, use the sizers to cut the painters tape perfectly, and line it up with the lines you just created, and do 4 more stripes of diagonal lines going the opposite way.
 Step 4:
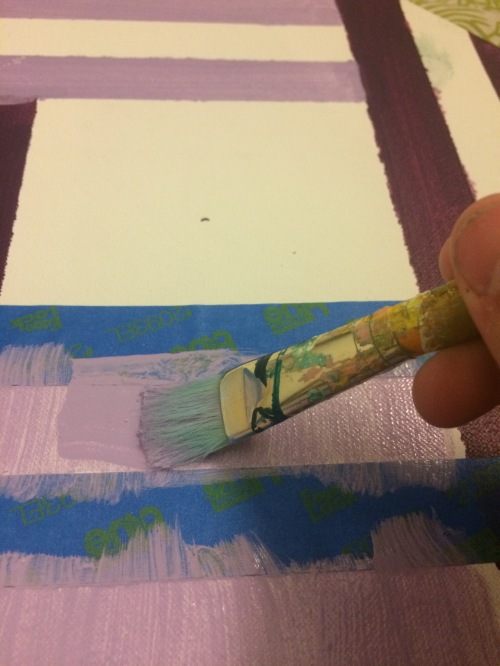
 - Paint in the white lines with a different color of paint ( or the same color, your choice). Be carful not to paint over the other color of paint, and if you like, use a small brush to fix up any overlapping of the paint. You may do this while the color that you just painted is drying.
 Step 5:
 - Just like the last step, slowly peel the tape off the canvas, and your painting should look like the picture shown above.
 Step 6:
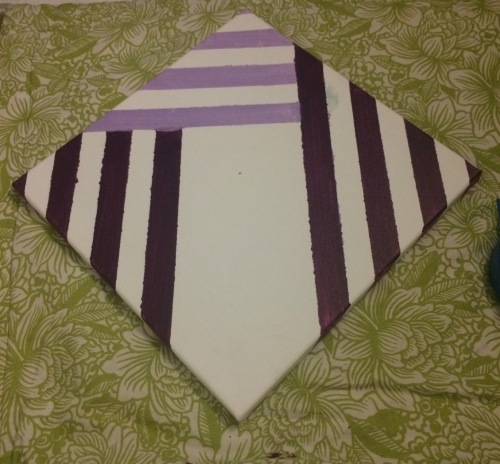
 - Flip the canvas so that the stripes that you just painted are in the bottom left corner. Tape 4 more diagonal lines going the opposite way of the lines you just painted. Paint these stripes with the color you used on the first stripes you painted. Again, you can fix up any of the paint that overlapped while the other paint is drying.
 Step 7:
 - Peel the tape off slowly, and your painting should look somewhat like this picture shown above.
 Step 8:
 - Flip the painting again, so that the stripes that you just painted are in the bottom left corner of your canvas. This time the tape will be placed between the stripes you just painted, and the first stripes you painted. Then paint these stripes with the second color you used. ( do 4 stripes of tape again)
 Step 10:
 - Take the tape off the canvas slowly, and your canvas should resemble the picture shown above. Turn your canvas so that the very first stripes you painted are in the bottom left corner.
 Step 11:
 - Put the tape going up, in the middle of the canvas. Fill this with either color. ( I chose the first color we used)
 Step 12:
 - Slowly peel off the tape and your canvas should look like this. Hold on, your not done yet!
 Lastly (step 13):
 - If your would like to make your painting more professional, then take a small paint brush, and use some white paint to cover up any paint that seeped through the painters tape.Now you are done! You can prop this up on a shelf or, you can hang it on the wall, Your choice. I hope you enjoyed this tutorial, make sure to pin it, share it with your friends, and like it! Comment on it too, (tell us about any spelling or grammar mistakes!). Thanks so much! -Life: By J&L (;


Love the post, maybe consider better lighting with the images… Maybe you guys should start posting a little more frequently? Maybe at least once a month? 😝
LikeLike
OMG I TOTALLY LOVE THIS,,,,,, TOTALLY GONNA DO IT!!!!!
LikeLike
Same!
LikeLike